
Backpacking can be a literal pain in the neck sometimes. That’s why it is important to learn how to pack a backpack and balance the weight so that you hike the longest with pain-free.
Balancing the load is not difficult, it takes a time to do the organization and a little more time to practice and learn the best set for you. However, there are a few guidelines that you should try to stick to every time you load up your pack. So, if you are new to backpacking, or just want to improve your skills, we’ve got you covered.
Learn how to pack a backpack for a multi-day hiking trip with hacks in EasyBackpack.
HOW TO PACK A BACKPACK

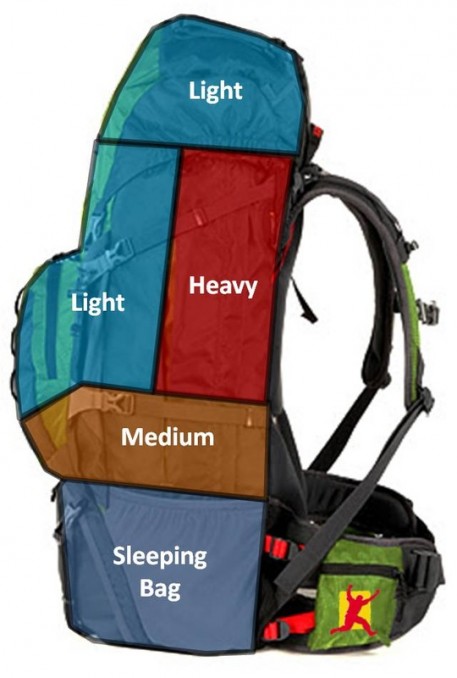
A very important rule to follow whenever you pack a backpack for a long hike is to do in three sections: Bottom, Middle, and Top.
Always start by the bottom, balance the load by keeping heavy things in the middle, and put your essentials for the trail on top. This way the things you need are always within reach and don’t require taking off your backpack and digging through the whole thing.
In the following, I share the system for how to pack. A list of items that works for me, but it should serve as a handy checklist for your next trail.
LAY OUT ALL OF YOUR BACKPACKING GEAR
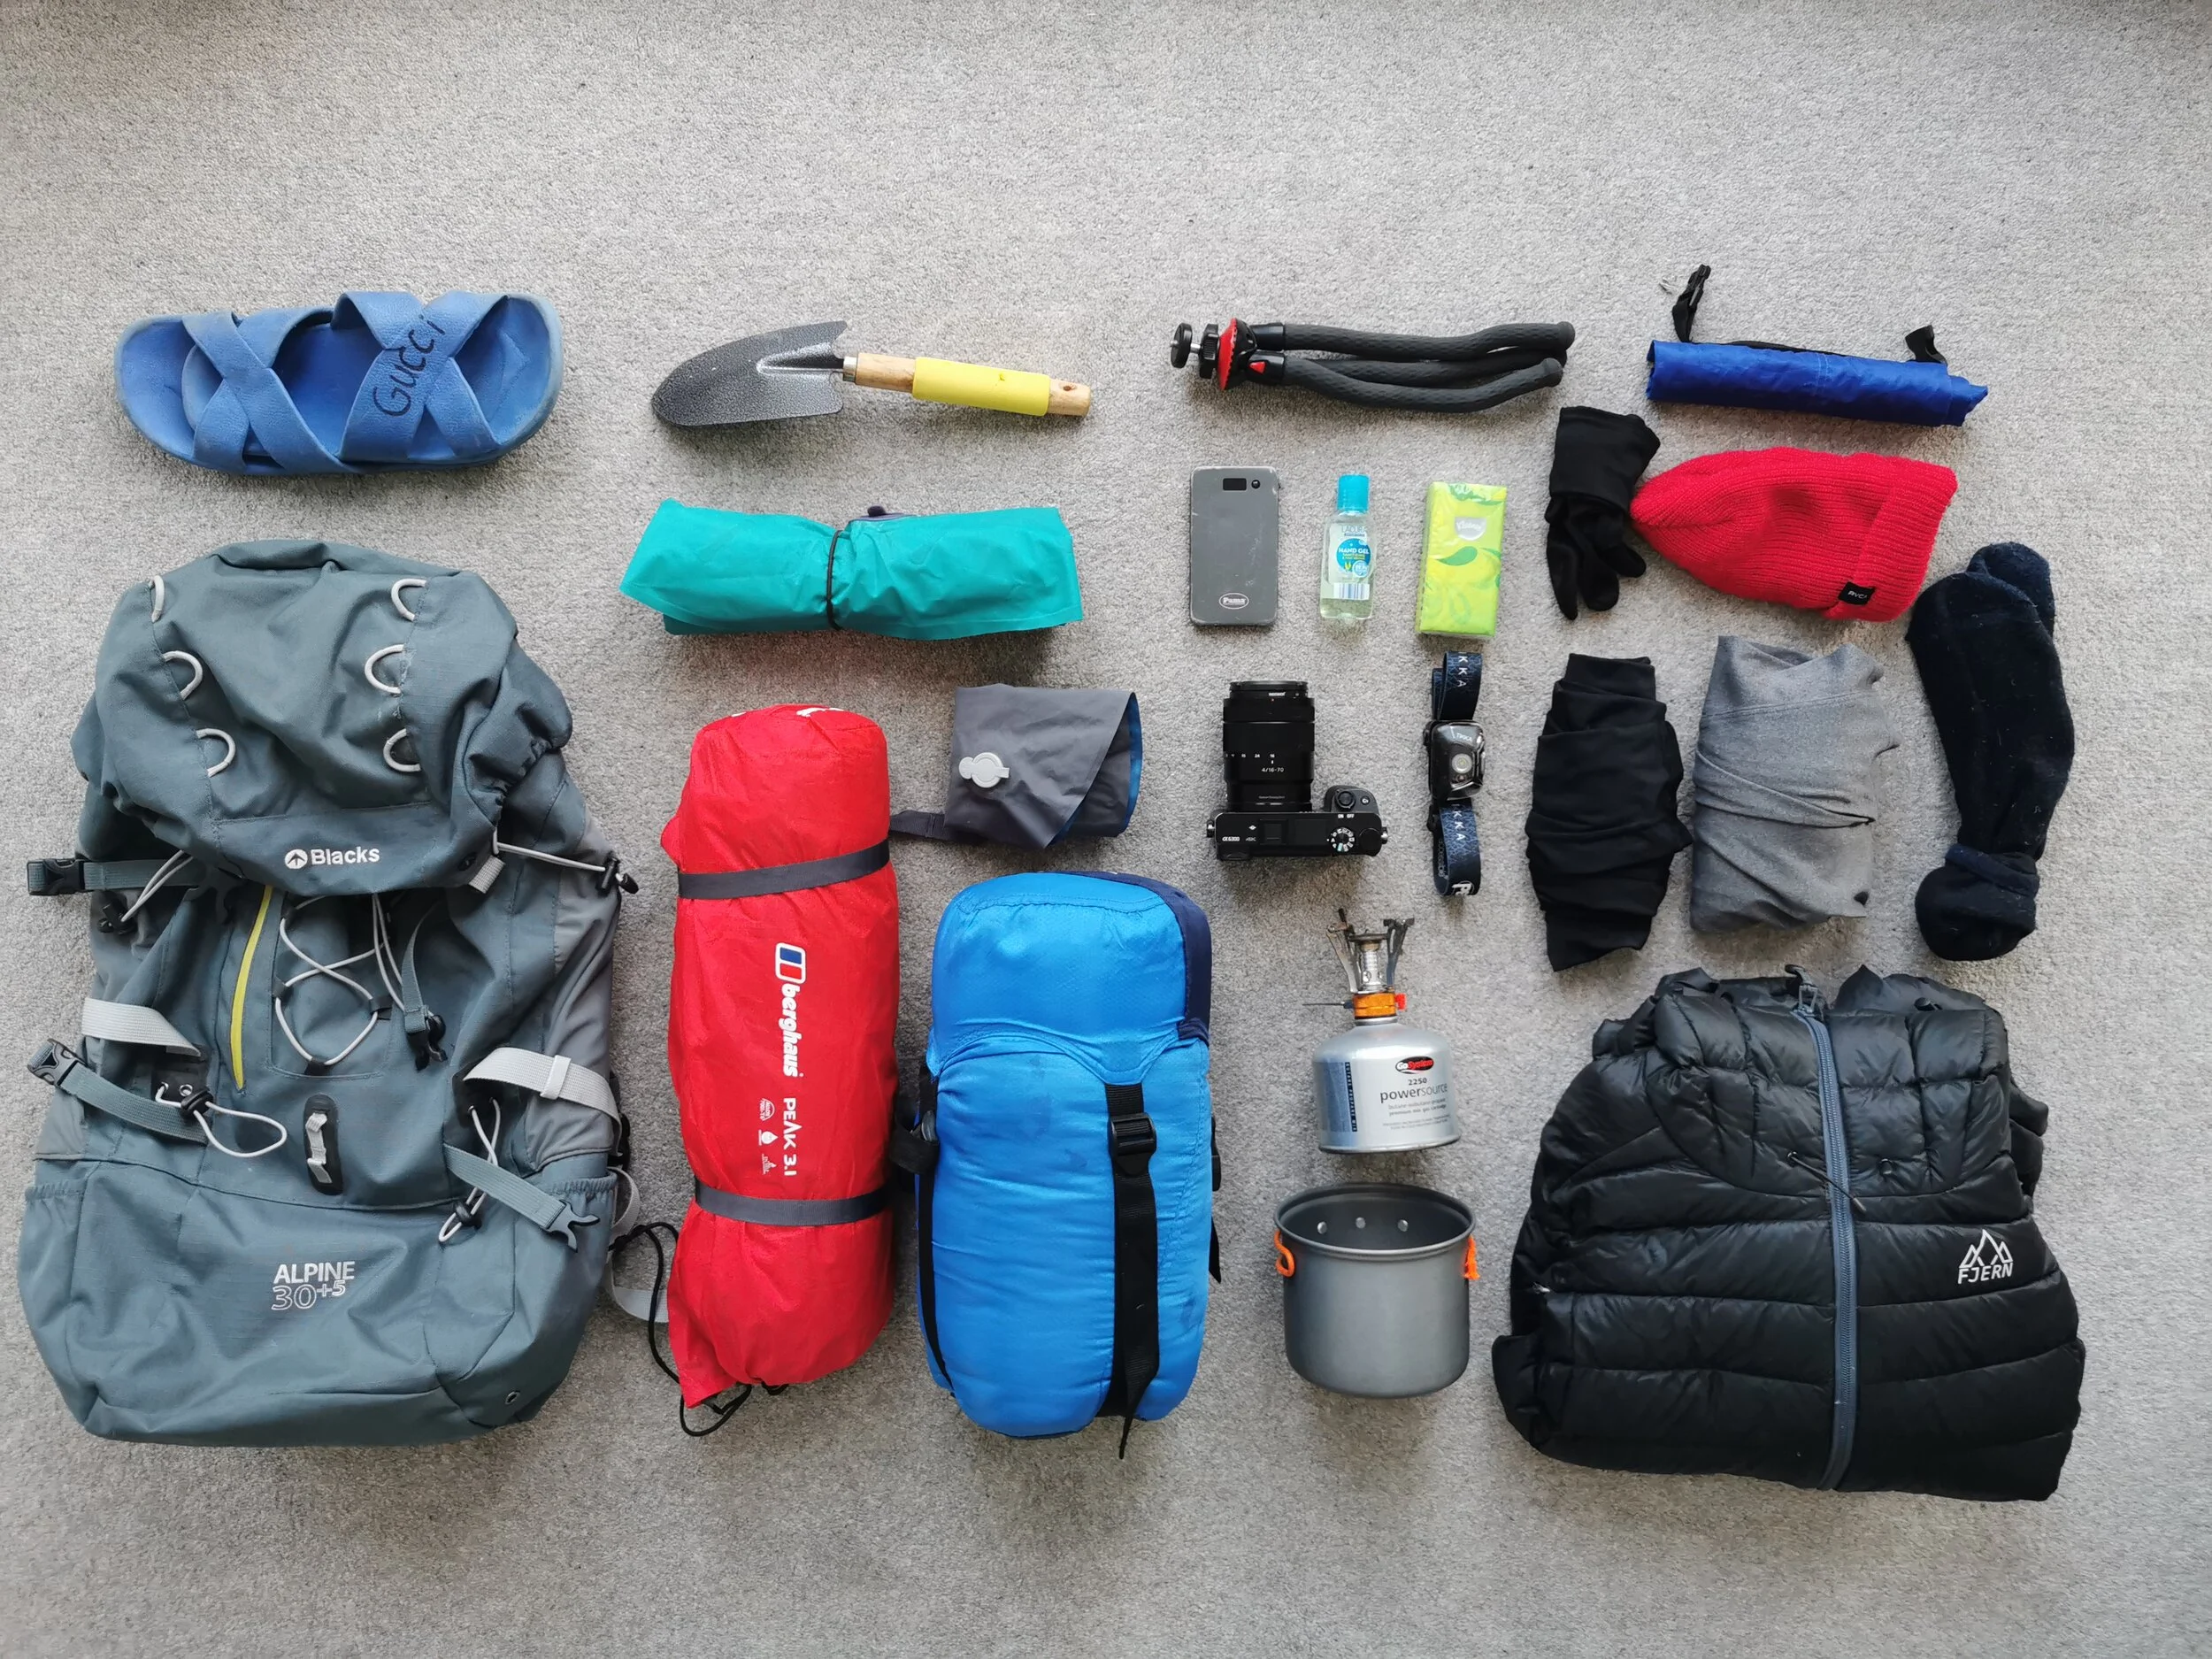
Before starting with the 3 section strategy, the first step is to lay out all of your gear to see if you can get rid of something, I prefer to organize my stuff into this way :
- Shelter / Sleeping gear
- Clothes
- Food
- Cooking gear
- Small stuff that you need easy access to during the day
Getting organized before you put everything in your backpack will:
- Make you go through all your items easily and compare with the chacklist with making sure that nothing is forgotten.
- Make you avoid packing things that you don’t need.
BOTTOM OF PACK ITEMS
This section is reserved for things you won’t need until you get to camp. Anything big, bulky, that can be compressed into the bottom of your pack goes here. Think of it as the non-essentials while you’re out on the trail.
This section is reserved for things like:
- Sleeping bag
- Tent / Shelter
- Loose Clothing: extra layers and clothes
- Other items for camp
Firstly, I pack my sleeping bag in a compression sack and put that at the very bottom. Then I use loose clothing that I won’t need during the day to fill in the gaps on the edges.
Some people like to put their clothes in a separate sack, but I like to keep my clothes loose. By keeping my clothing loose, I can use individual items of clothing that I don’t need during the day to fill in the gaps.
PRO-TIP: If there’s a chance of rain on your backpacking trip and you don’t have a waterproof pack cover, before you put anything in your pack, line your bag with a trash bag and put all your items inside the liner to stay dry.

MIDDLE OF PACK ITEMS
The middle section of your pack is designated for heavyweight items. By placing things in the center and as close to your back as possible, you relieve your back of unnecessary stress. Plus, it keeps things from shifting out of place and forcing you to carry an awkward, uneven load.
- Stove & Gas
- Food - The heaviest things only, and water is outside.
- Hiking shoes– sometimes I just strap these to the outside of my pack, depending on the plan.
TOP OF PACK ITEMS
The top of your backpack includes the uppermost portion inside the pack and “the brain”, the part that’s on top when you close your pack. It’s typically a zippered compartment that can be removed and used as a daypack when you hike.
Here’s what I like to keep at the top of my pack:
- Rain Gear – If there is any chance of rain, you want your rain gear accessible at the top of your backpack.
- First Aid– This is important to keep easily accessible so you’re not digging through your pack if you need something.
- Snacks for the trail – I usually take my food for the day at the top of my pack so it’s easy to access.
- Water Filter – If needed
- Bathroom Kit
BRAIN/LID PACK ITEMS
These are the items I like to keep in the brain/lid of my backpacking pack for the easiest access:
- Travel-sized bug spray
- Travel-sized sunscreen
- Map
- Headlamp
- Phone
- Camera
- Quick snacks
- Spoon / Fork
- Multitool
- Lighter
Hip belt pockets are also a great place to keep things that you want on hand like chapstick, snacks, sunglasses, and other small items. For other miscellaneous items, decide whether you need to access them during the day. If not, put them closer to the middle and use them to fill in gaps. If you do need them, keep them closer to the top.
IMPORTANT: Always keep some family members and friends informed where are you going , and your trail so that they follow up in case of emergency.

Here’s a visual breakdown of how to pack a backpack for camping and hiking:
CHECKLIST


0 Comments